
Goal
Add a link field and an image field to the Vendor content type.
Prerequisite knowledge
Section 2.3, “Concept: Content Entities and Fields”
Site prerequisites
The Vendor content type must exist. See Section 6.1, “Adding a Content Type”.
Steps
Add the fields Vendor URL and Main image to the Vendor content type.
- In the Manage administrative menu, navigate to Structure > Content types (admin/structure/types). Then click Manage fields in the dropdown button for the Vendor content type. The Manage fields page appears. From here you can either create a new field for the content type or re-use an existing field. Note that the names and descriptions of the content types and fields that were provided by your installation profile are shown in English on these pages; see Section 2.7, “Concept: User Interface, Configuration, and Content translation” for an explanation.
Click Create a new field. The Add field page appears.
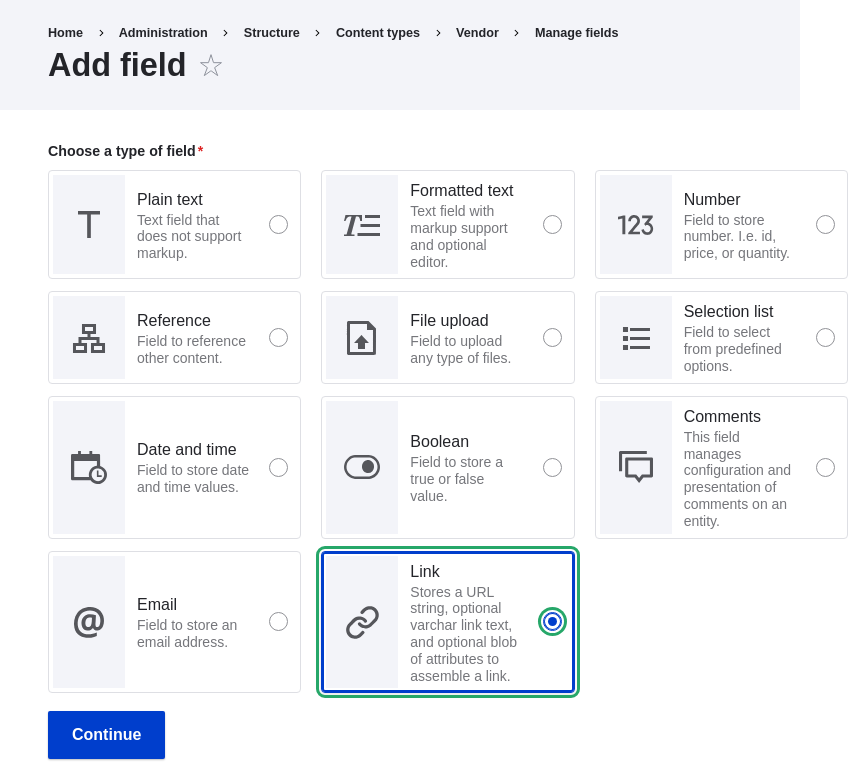
- Choose the Link field type from the Choose a field type options. Click Continue. The Add field page appears with a form to configure the field label.
Fill in the fields as shown below.
Field name Explanation Value Label Label that is visible in administration pages Vendor URL Choose a type of field Field type Link A machine name is automatically generated, based on the Label value. Click Edit if you want to override the default name.

Click Continue. The page _Vendor URL settings for Vendor appears which allows you to configure the field. Fill in the fields as shown below.
Field name Explanation Value Label Label that is visible in the content form Vendor URL Allowed number of values The number of values that can be entered Limited, 1 Help text The instruction that is shown below the field (leave blank) Required field Whether the field is required or not Unchecked Allowed link type The kind of links that can be entered External links only Allow link text Whether a link text can be entered Disabled 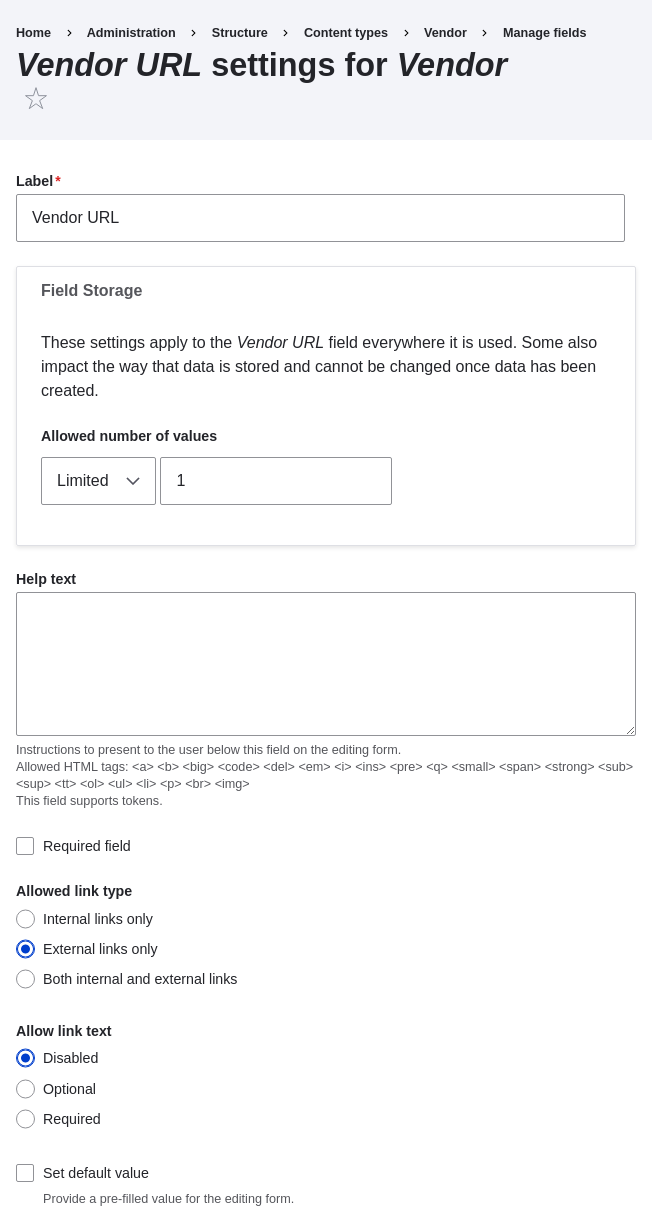
- Click Save settings. The Vendor URL has been added to the content type. Continue creating the Main image field.
- Click Create a new field. The Add field page appears.
- Choose the File upload field type from the Choose a field type options. Click Continue. The Add field page appears with a form to configure the field label.
Some field types require the selection of a sub-type. Fill in the fields as shown below.
Field name Explanation Value Label Label that is visible in administration pages Main image Choose an option below Field sub-type Image Click Continue. The page Main image settings for Vendor appears. Fill in the fields as shown below.
Field name Explanation Value Label Label that is visible in the content form Main image Allowed number of values The number of values that can be entered Limited, 1 Default image You can set a default image here. This will be used when you do not provide an image when creating a Vendor content item. (leave blank) Help text The instruction that is shown below the field (leave blank) Required field Whether the field is required or not Checked Allowed file extensions The type of images that can be uploaded png, gif, jpg, jpeg File directory The directory where the files will be stored. By providing a file directory value, you ensure that all images uploaded via the Main image field will be located in the same directory. vendors Minimum image dimensions The minimum dimensions of the uploaded image 600 x 600 Maximum upload size The maximum file size of the uploaded image 5 MB Enable Alt field Whether an alternative text can be entered Checked Alt field required Whether an alternative text is required Checked 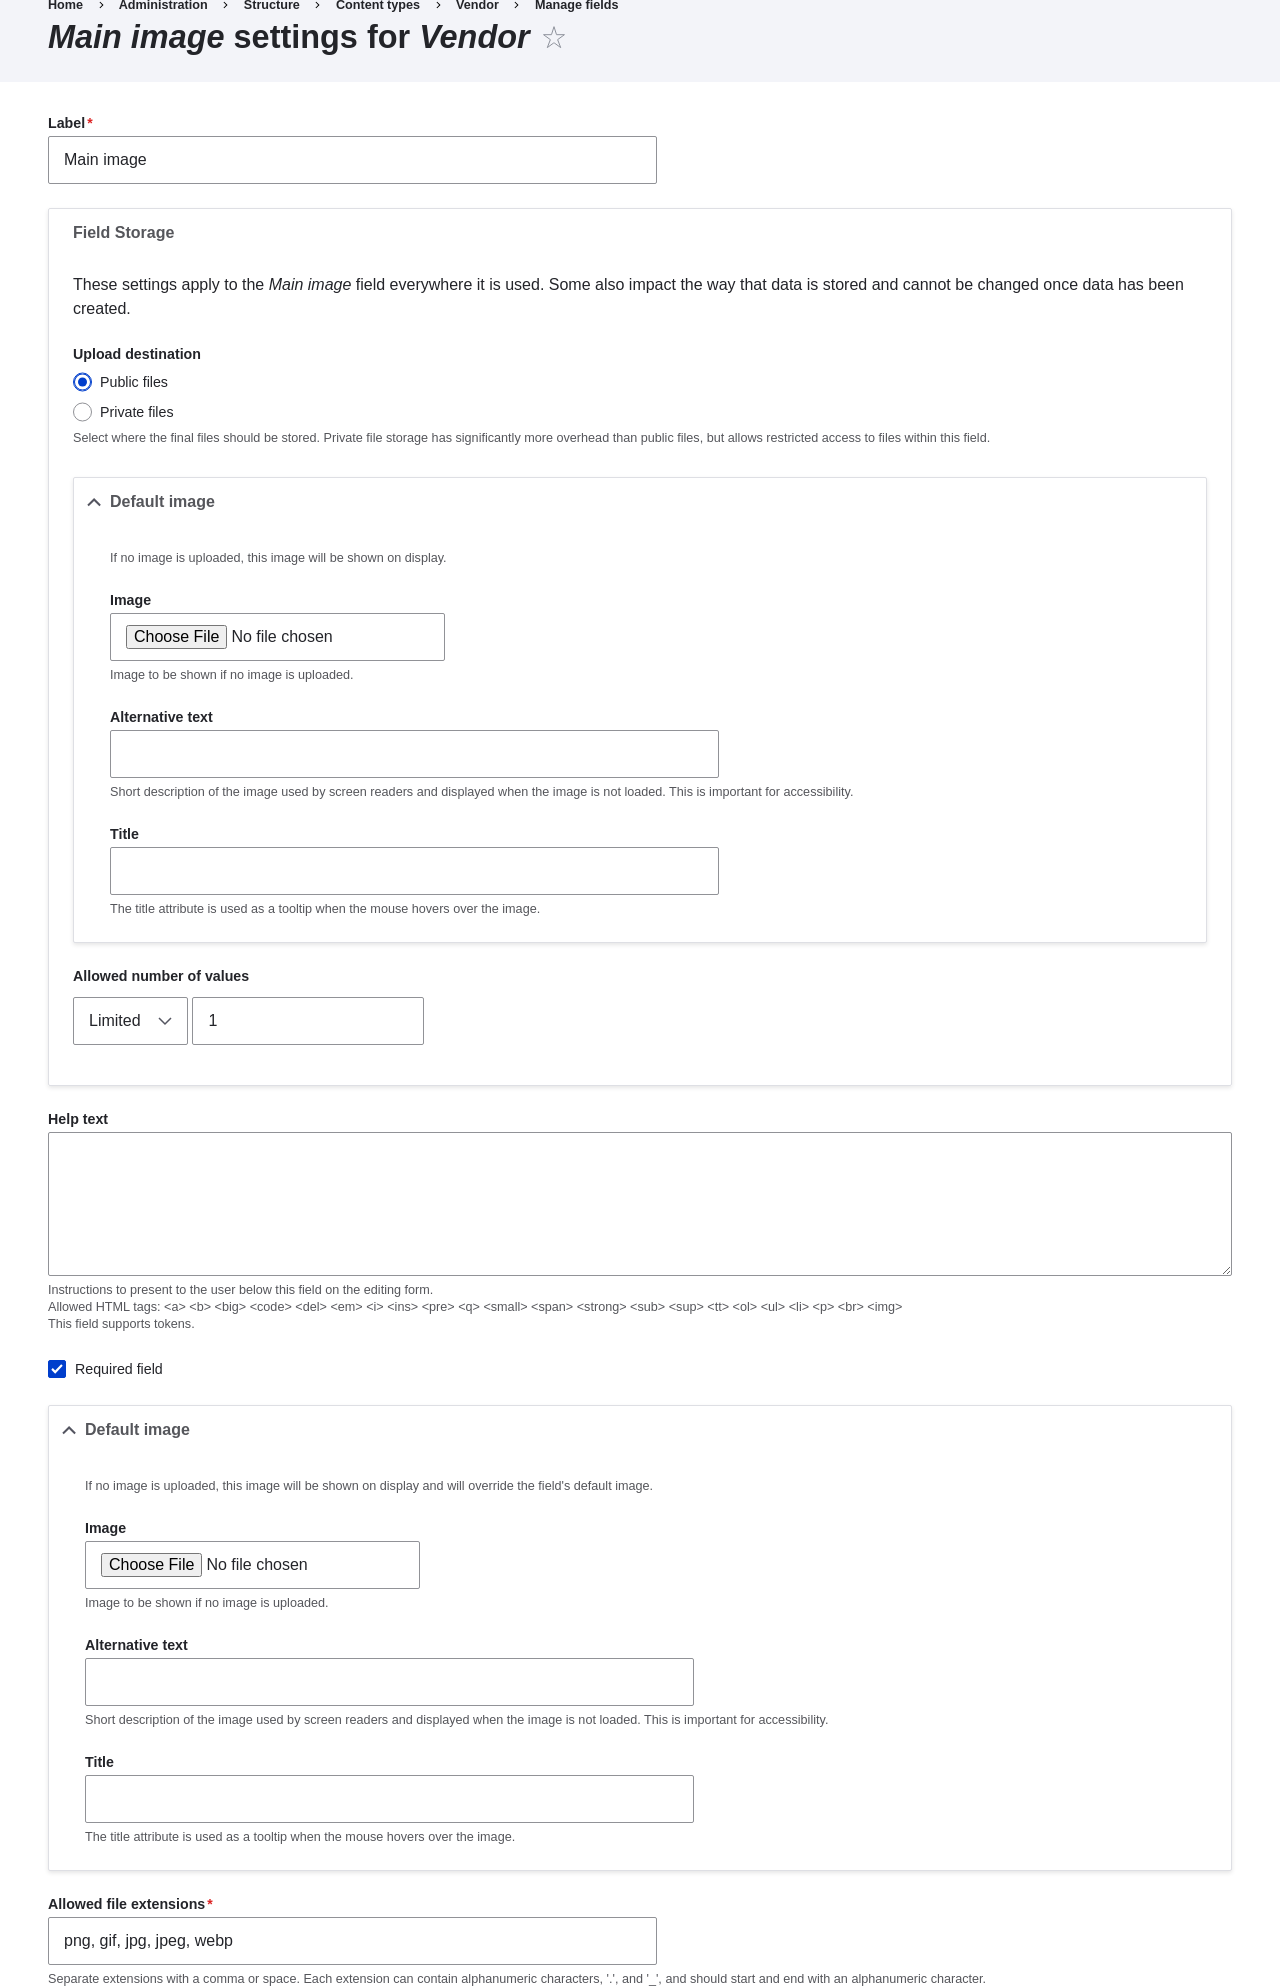
Click Save settings. Main image has been added to the content type.
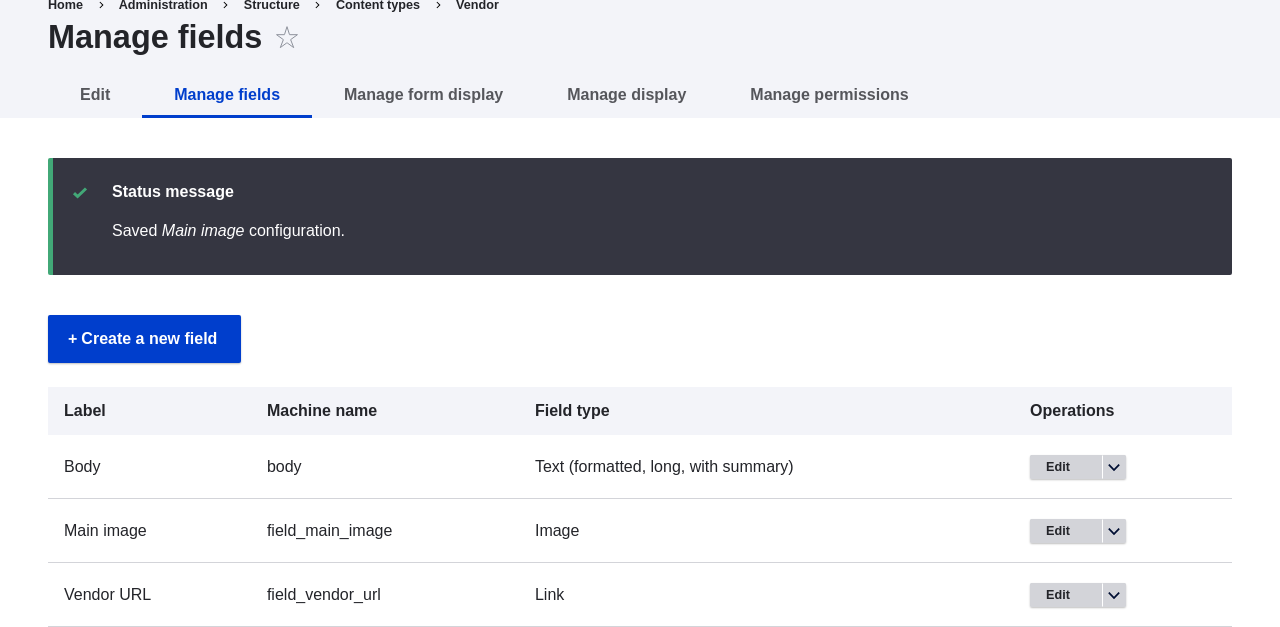
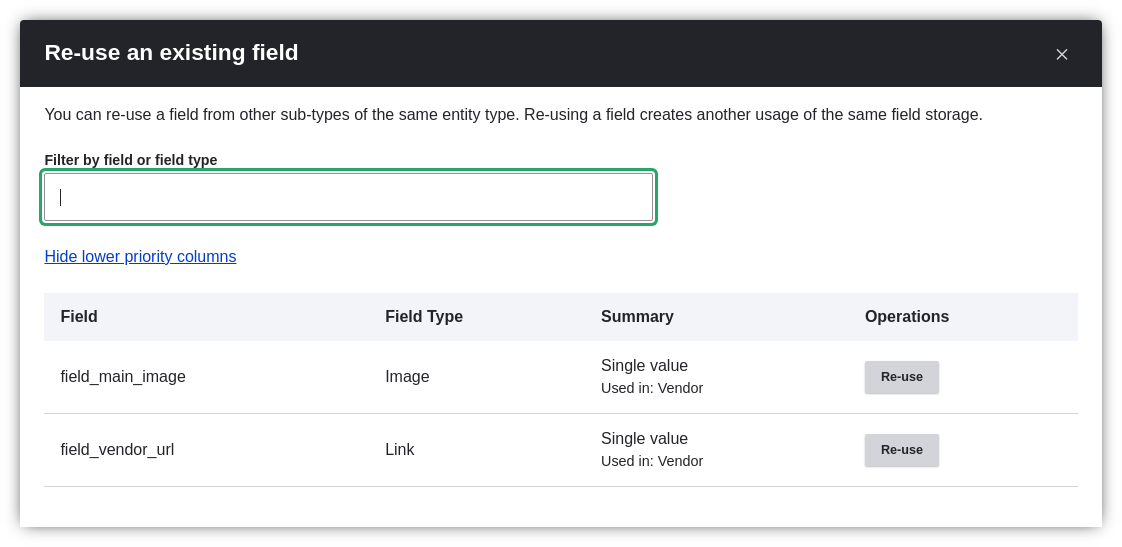
Add a Main image field to the Recipe content type, using similar steps. Start by navigating to the Recipe content type’s Manage Fields page. Then use the Re-use an existing field button to open the modal dialog and press the Re-use button that corresponds with the Main image field in the table. Then skip to step 7 and follow the remaining steps.
- Create two Vendor content items (see Section 5.2, “Creating a Content Item”) called "Happy Farm" and "Sweet Honey". Make sure that they include images and URLs.
Expand your understanding
- Section 6.12, “Concept: Image Styles”
- Section 6.11, “Changing Content Display”
- Section 6.9, “Changing Content Entry Forms”
Additional resources
Drupal.org community documentation page "Add a field to a content type"
Attributions
Written by Sree Veturi and Boris Doesborg, and Joe Shindelar at Drupalize.Me.